> ## Documentation Index
> Fetch the complete documentation index at: https://docs.tenderly.co/llms.txt
> Use this file to discover all available pages before exploring further.
# Generate and Manage API Access Tokens
> Create Tenderly access tokens scoped to all projects or a single project, set expiration dates, revoke tokens, and authenticate Tenderly API requests.
Access tokens authenticate requests to the [Tenderly API](/api-reference). Organization access tokens are scoped: a token reaches either every project that is open to the organization or exactly one project, and it can carry an optional expiration date.
Generating API access tokens and using the Tenderly API are available on the paid plan. To enable them for your account, [contact our sales team](https://tenderly.co/contact-us) to schedule a call and discuss upgrading your plan.
## Token scopes
A token's scope is chosen at creation and cannot be changed afterwards. To change what a token can reach, create a new token and [revoke](#revoke-an-access-token) the old one.
### Global tokens
A global token has the **All projects** scope: full access to every project in the organization except [restricted projects](/platform/account/projects/restricted-projects). This includes projects created after the token, including projects the token itself creates through the API. There is no way to grant a global token access to a restricted project.
### Project tokens
A project token has the **One project** scope: access to exactly one project, whether that project is open to the organization or restricted. A project token is the only way to access a restricted project through the API.
Creating a token for a restricted project requires the **Manage access tokens** [permission](/platform/account/organizations/members#member-permissions) and membership in that project. The project picker only lists projects you can see.
## Create an organization access token
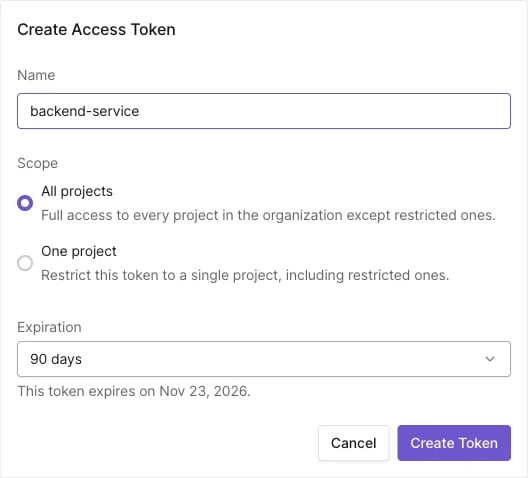
1. In the left sidebar, navigate to the organization and select **Access Tokens**.
2. Click **Create Access Token**.
3. Enter a name.
4. Under **Scope**, select **All projects** for a global token or **One project** and pick the project for a project token.
5. Optionally set an [expiration date](#set-a-token-expiration-date).
6. Click **Create Token**.
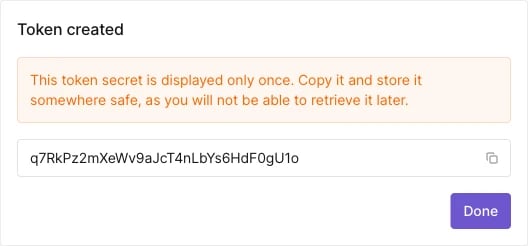
 The token secret is displayed only once, immediately after creation. Copy it and store it in a safe place; it cannot be retrieved later.
 ## Create a project token from project settings
Every project's [Settings](/platform/account/projects/settings) page has a **Project Access Tokens** section listing the tokens scoped to that project, next to a **Copy API URL** button. Click **Create** to mint a token there; the scope is fixed to that project, so you only choose a name and an optional expiration.
On a restricted project, the section notes that global tokens can't access the project and links to the organization's token inventory.
## Set a token expiration date
When creating a token, set it to expire in **30**, **60**, or **90 days** or **1 year**, or leave it with **No expiration** (the default). A token without expiration stays valid until you revoke it.
The expiration date cannot be changed after creation. To extend access, create a new token, deploy it wherever the old one is used, and let the old token expire or revoke it. Both tokens work until the old one expires, so the replacement causes no downtime.
Before a token expires, Tenderly sends email reminders, and a warning card appears in the dashboard sidebar while tokens are within 7 days of expiring. In the token list, an expired token is flagged in the **Expires** column.
Tokens created before expiration support was introduced have no expiration date and never acquire one.
## Manage access tokens
The organization's **Access Tokens** page lists every token with its **Name**, **Scope** (All projects or the project name), **Created**, **Last used**, and **Expires** columns. Search the list with the filter box and sort by the **Created** column; newest tokens come first by default.
## Create a project token from project settings
Every project's [Settings](/platform/account/projects/settings) page has a **Project Access Tokens** section listing the tokens scoped to that project, next to a **Copy API URL** button. Click **Create** to mint a token there; the scope is fixed to that project, so you only choose a name and an optional expiration.
On a restricted project, the section notes that global tokens can't access the project and links to the organization's token inventory.
## Set a token expiration date
When creating a token, set it to expire in **30**, **60**, or **90 days** or **1 year**, or leave it with **No expiration** (the default). A token without expiration stays valid until you revoke it.
The expiration date cannot be changed after creation. To extend access, create a new token, deploy it wherever the old one is used, and let the old token expire or revoke it. Both tokens work until the old one expires, so the replacement causes no downtime.
Before a token expires, Tenderly sends email reminders, and a warning card appears in the dashboard sidebar while tokens are within 7 days of expiring. In the token list, an expired token is flagged in the **Expires** column.
Tokens created before expiration support was introduced have no expiration date and never acquire one.
## Manage access tokens
The organization's **Access Tokens** page lists every token with its **Name**, **Scope** (All projects or the project name), **Created**, **Last used**, and **Expires** columns. Search the list with the filter box and sort by the **Created** column; newest tokens come first by default.
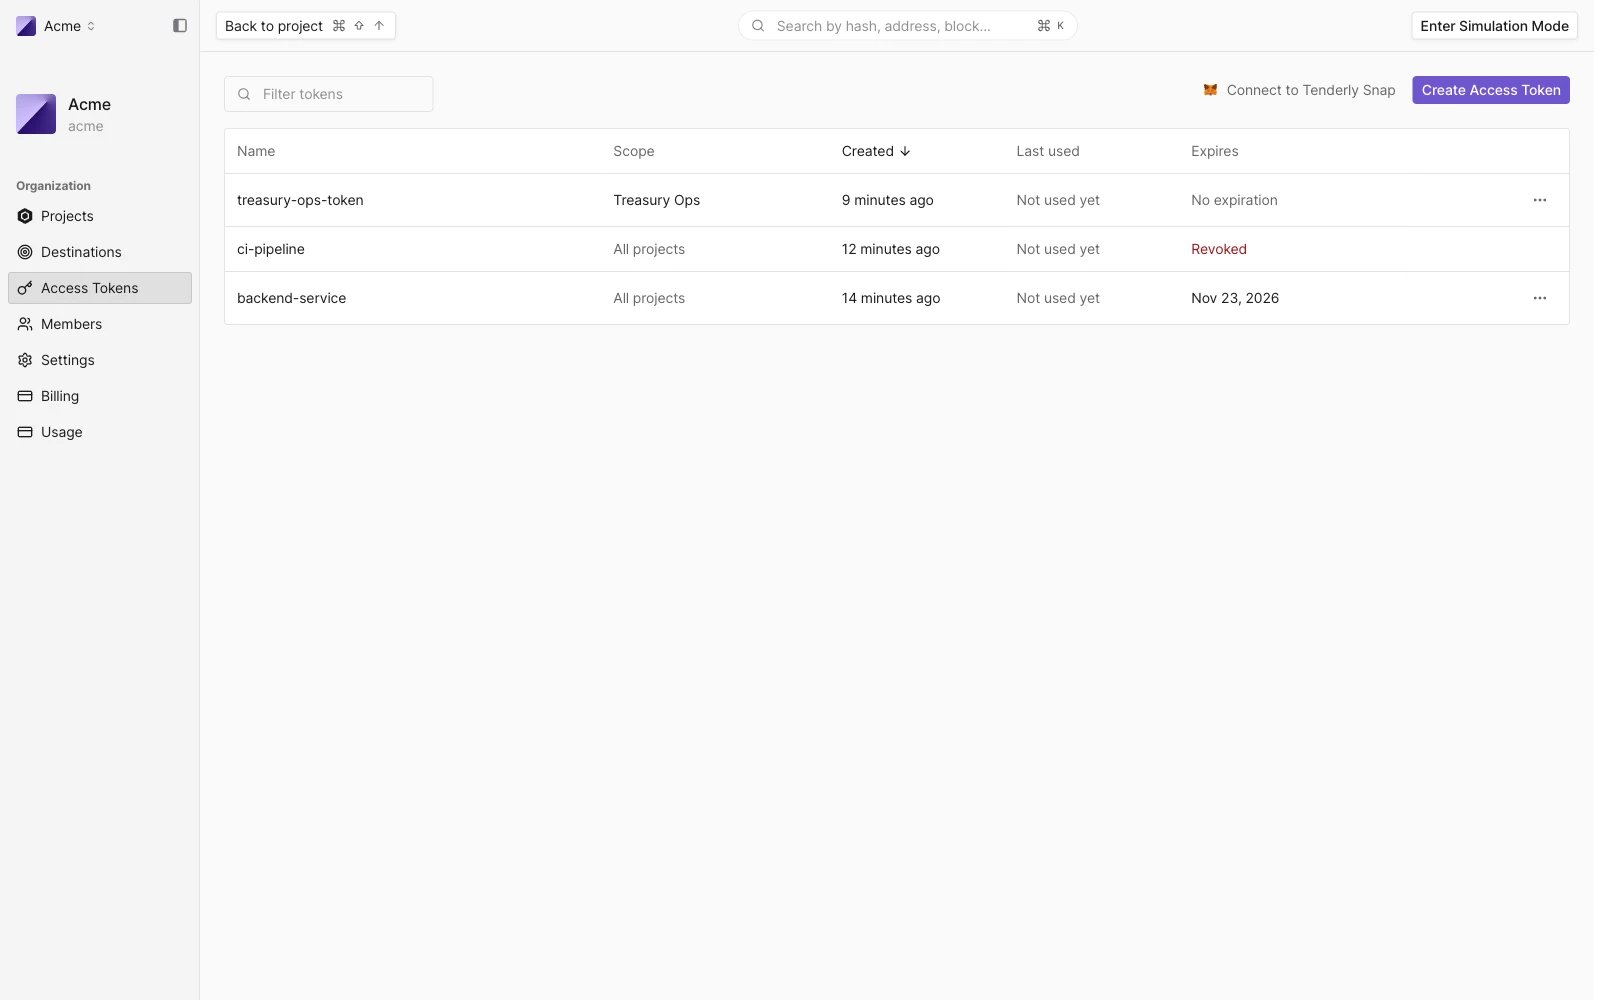 **Last used** tracks each token's most recent use across the organization. It is not broken down per project.
Tokens created within an organization are accessible and manageable by members with the Manage access tokens permission.
## Revoke an access token
Open the token's row menu and select **Revoke**, then confirm. Revoking disables all endpoints and third-party services that use the token, effective immediately. Revoked tokens stay listed in the inventory with a **Revoked** state, so the record of the credential is preserved.
Deleting a project revokes every project token scoped to it. Global tokens are unaffected by project deletion; the [delete confirmation](/platform/account/projects/settings#delete-project) states how many project tokens will be revoked.
## Personal account access tokens
Personal tokens authenticate the individual account they're tied to. Personal access tokens have no access to restricted projects; use a project token instead.
To create a token for your personal account:
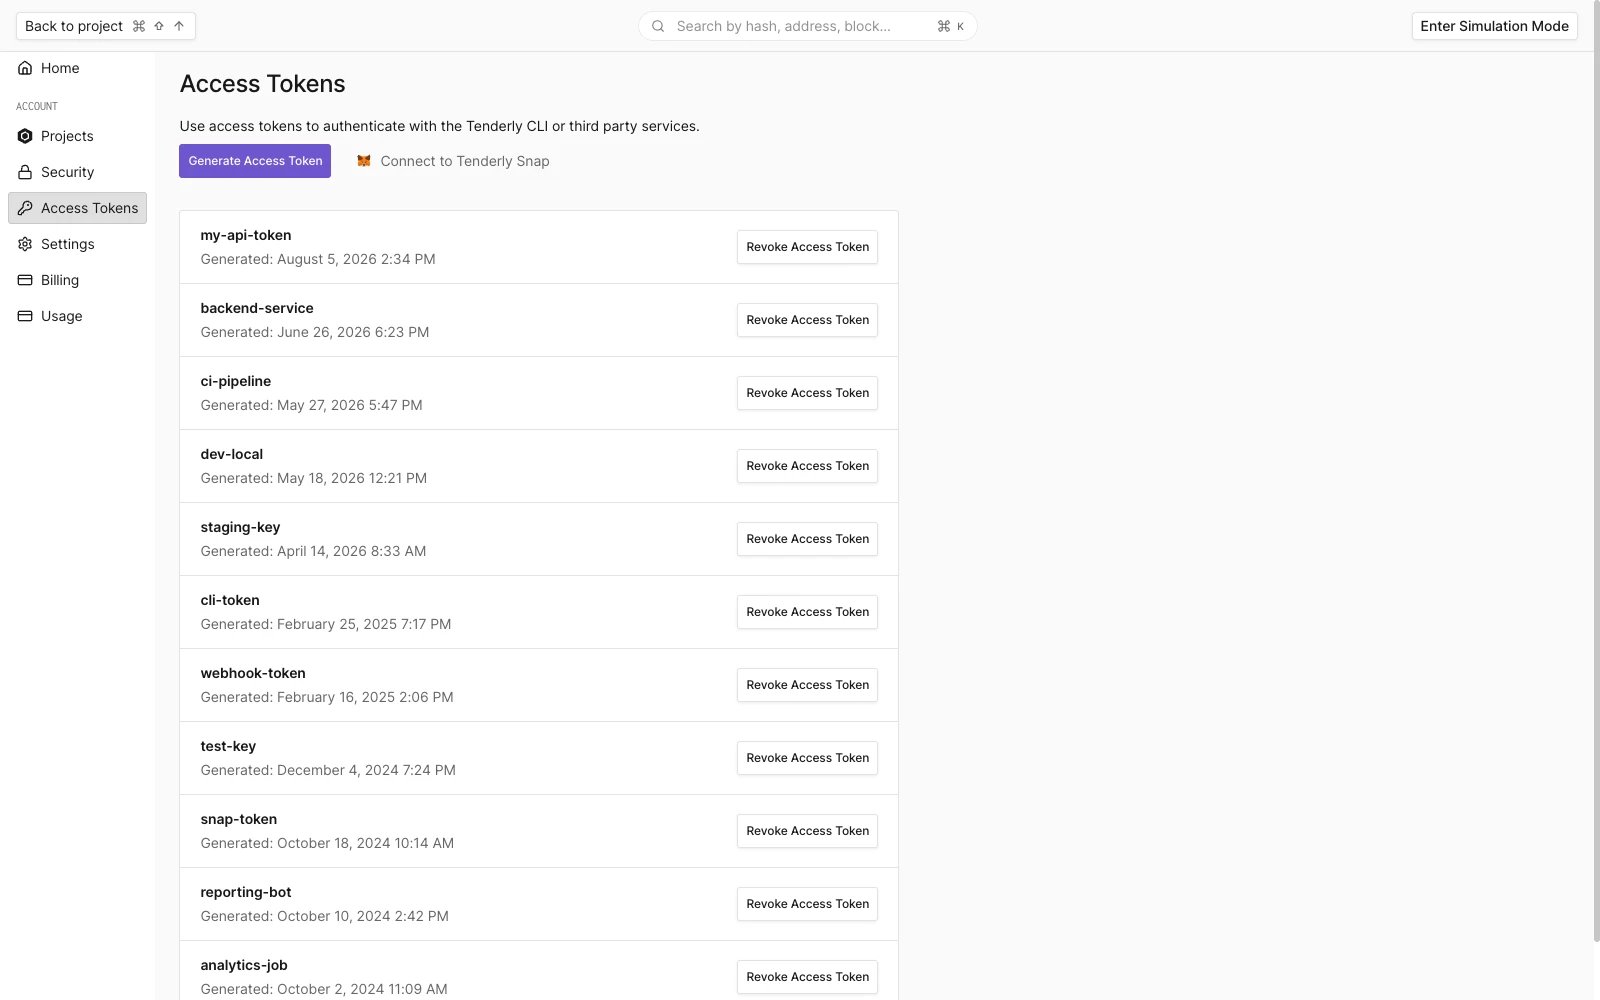
1. Click on your **profile photo**.
2. Navigate to **Account Settings**.
3. Go to the [**Access Tokens**](https://dashboard.tenderly.co/account/authorization) tab.
4. Click **Generate Access Token** to create a new token.
**Last used** tracks each token's most recent use across the organization. It is not broken down per project.
Tokens created within an organization are accessible and manageable by members with the Manage access tokens permission.
## Revoke an access token
Open the token's row menu and select **Revoke**, then confirm. Revoking disables all endpoints and third-party services that use the token, effective immediately. Revoked tokens stay listed in the inventory with a **Revoked** state, so the record of the credential is preserved.
Deleting a project revokes every project token scoped to it. Global tokens are unaffected by project deletion; the [delete confirmation](/platform/account/projects/settings#delete-project) states how many project tokens will be revoked.
## Personal account access tokens
Personal tokens authenticate the individual account they're tied to. Personal access tokens have no access to restricted projects; use a project token instead.
To create a token for your personal account:
1. Click on your **profile photo**.
2. Navigate to **Account Settings**.
3. Go to the [**Access Tokens**](https://dashboard.tenderly.co/account/authorization) tab.
4. Click **Generate Access Token** to create a new token.
 This documentation is built and hosted on [Mintlify](https://mintlify.com), a developer documentation platform.